Thursday, October 20, 2011

Go ALL BLACKS!!!

Last week, All Blacks met Wallabies in the RWC2011 semi finals, and All Blacks managed to win the game with 6 (Wallabies) to 20 (All Blacks). The whole New Zealanders were partying after the win as according to the news.

Meanwhile myself and my partner were watching the game from our cosy living room without the disturbance of people blocking the screen as compared to you watching it outside at any other places.

This coming Sunday is the final of Rugby World Cup 2011 in Eden Park, Auckland. All Black will be playing against French!

Who will be the WINNER?

Every New Zealanders will definitely wants their country to win the World Cup as they have waited since 1987, where the All Black won the first Rugby World Cup. That was about 24 years ago. There's no wonder it NZ is being described as the Land of Long Wait by the newspaper. Even the Steinlager did an advertisement specially for the world cup featuring the long await winning moment by one of the All Black supporter. Watch it from the Youtube. The advertisement really resembles the much anticipation by the New Zealanders.

Hence let's hope for the best that All Black will win the Rugby World Cup 2011!

GO ALL BLACKS!!

Tuesday, October 11, 2011

Rugby World Cup 2011 Opening Night in Auckland City - 9th September 2011


This year, New Zealand is hosting the Rugby World Cup event throughout the country. Therefore there were a few opening night events happening around the country. Of course, the main one was at the Eden Park stadium where the first game kicks off with All Black vs Tonga at 8.30pm. Apart from that, Auckland City did had some activities going on too.

Therefore, my partner had taken a day off from work to bring me down to the city to experience the once in a lifetime experience of Rugby World Cup 2011 Opening night in Auckland city. This is a big hit thing in New Zealand because the New Zealanders are so passionate about rugby. All Black is a men's national rugby union team that represents New Zealand in international rugby union competitions. It is also one of best team around the world. Therefore, we went down to the city early in the morning to avoid the heavy traffic.

As we walked along Queen's Street that afternoon, we saw a lot of Tonga's and All Black supporters down in the city. There's one particular MPV that created noise along Queen's Street as it drove down to downtown. The MPV was covered with lots of Tonga's flag and it honk it's way down.


By the time we were at the Quay Street, it was around 12.30pm, and there were already quite a lot of people queueing up at the entrance to the Queen's Wharf. Since the Queen's Wharf only opens at about 4pm, we adjourned to our usual place, Barabra cafe, for some coffee and drinks.


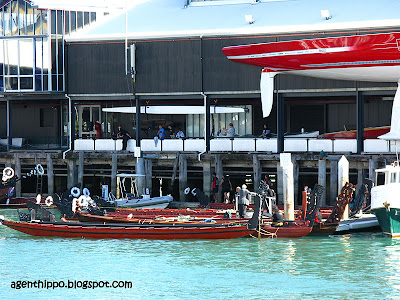
Sitting by the cafe, we managed to watch some rehearsal going on before the opening night. The rehearsal includes paddling Waka boat, dancing and music playing on one of the ship.


When it's about 3pm, the whole area was already jam packed with a lot of people. Especially at the Queen's Wharf and Princess Wharf, where we were that time. Before that, we actually planned to go over to Queen's Wharf to witness the opening, but due to the amount of people around the city, we decided to just station ourselves at Barabra cafe till the end of the opening event.


The opening event started with arrival of Maori's Waka boats moving from the Princess Wharf to the Viaduct Basin. Once the event started, all area was jam packed with people. I couldn't even get a glimpse of the Waka Boats till I actually climbed up the sofa's arm at Barabra's Cafe. Just look at the amount of people through the picture below and you will know what I mean. Besides, if you did watched the news previously, you know how much people were there.


Only by climbing up at the sofa's arm, I managed to catch a glimpse of the Waka boat's movement to the Viaduct Basin. Besides, with that, I am able to take some clear photos without the crowds' heads.


There were also a lot of boats sailing out at the Viaduct Habour to get a better view of the opening night event activities, by looking at the photo above.

After that, I walked out from the Princess Wharf to catch a glimpse of how's the crowd like outside at Quay Street, while my partner still sitting down at Barabra cafe to save ourselves a seat throughout the night. All I saw was crowds and crowds of people everywhere.


The whole Quay Street was jam packed with people.


There's a lot of people at the PWC building and also above the HSBC building.


There's also some that would just climb up onto the bus stop's roof to catch a glimpse of the activities at Quay Street.

All in all, the city was packed with thousands and thousands of people. You can also have an aerial view of that day through the TVNZ website (http://tvnz.co.nz/national-news/aerial-video-fans-pour-into-auckland-cbd-1-46-4394682).

Then at about 8pm, the sound and light show comes to live featuring Auckland's biggest and brightest fireworks and light show set to music composed specially for the occasion by Don McGlashan.  There's fireworks from the Auckland's Sky Tower and also from the Viaduct Habour.


Once the fireworks ended, we walked back to our car and leave the city before everyone moves back home again. By the time we're home, we still managed to catch the second half of the game that night.

It was an eventful day.

Saturday, August 27, 2011

Thai + Malay?

Sometimes having to cook at the kitchen every day can makes you ran out of idea what to cook. After looking through the ingredients that were available in the fridge, I had decided to make pandan chicken.

Preparing and marinating the pandan chicken is easy. But it's not easy to wrap the chicken with the pandan leaves, especially if you would like to wrap it into a triangle shape. It was my first time making it, I am not able to wrap into a triangle shape as per what the Malaysian restaurant also does. I only manages to wrap it like a pentagon shape due to the small frozen pandan leaves that I can get here from New Zealand.

The usual way to cook pandan chicken is to deep fried it to enhance the flavour from the pandan leaves. However, this time I opt for a healthier version that was to bake it. It turned out to taste as good as the deep fried version minus the oiliness.


Meanwhile, my partner had managed to get a Malay version food - "tempeh" at an Asian grocery store nearby. Therefore, he was in charge in cooking the vegetables of the day, which was stir fried round beans with chillies and "tempeh".


My partner refer "tempeh" as the Malay version of blue cheese. Why? This is because "tempeh" is actually a soy product whereby it gone through the fermentation process which provides a firm texture with an earthy flavour as it ages. However, once you had cooked it, the "tempeh" become soft and the fragrance of it changes.

Hence that night, we had a Thai dish and Malay dish combination as dinner. Is it weird? No, I don't think so. It blends well for me.

Pandan Chicken Recipe
Serves: 4

Ingredients:
3 skinless and boneless chicken thigh
1 1/2 tablespoon turmeric powder
1 teaspoon palm sugar
2 teaspoon fish sauce
2 teaspoon cooking oil
1 stalk lemon grass
3 shallots
4 kaffir limes leaves
5 cloves garlic
2cm ginger
Pinch of salt and white pepper

Method:
1. Grind lemon grass, shallots, kaffir limes leaves, garlic and ginger until it is fine and evenly mixed.
2. Then add in turmeric powder, fish sauce, palm sugar, vegetable oil, salt and white pepper into the mixtures and mixed in evenly.
3. Marinate the chicken with the mixtures for at least 2 hour. Preferably to marinate it overnight.
4. Wrap the chicken with pandan leaves.
5. Preheat the oven to 180 degree Celcius.
6. Bake the wrapped chicken in the preheat oven for 20 minutes or until it is golden brown.

Tuesday, August 23, 2011

Penang Style Chee Cheong Fun

It was a day in a week where we will make a simple meal or a meal that doesn't involves rice. Last week, I decided to make Penang style chee cheong fun. It took me awhile before being able to successfully making a nice and proper chee cheong fun. And finally I managed to conclude to a few important tips that helps in making the chee cheong fun successful.

Tips:-
1. Make sure using a proper steamer to ensure the water is always boiling at a constant temperature.
2. Recommended to use a square tray instead of round to ensure the chee cheong fun has the same thickness after it is being rolled.
3. Make sure the chee cheong fun is thoroughly cooked and cool before rolling it up.
4. Rest the mixtures for an hour.
5. Constantly stirring the mixtures before pouring it into the tray for steaming.
6. Use a baking spatula to remove the chee cheong fun from the tray. It is easier as the baking spatula is quite flexible.

I managed to pick up the few tips after a few failures attempt. The more I made, the better it becomes. However, making chee cheong fun took me quite a few hours to get everything done as I was making 6 portions of share. But it is interesting to pick up the few tips. With that, I am able to make some other style of chee cheong fun by myself.

I served my Penang style chee cheong fun with some sweet sauce, prawn paste and chillies. Also I garnished it with some deep fried shallot and toasted sesame. 


Penang Style Chee Cheong Fun Recipe
Serves: 2

Chee Cheong Fun Ingredients 
230ml water
70 grams rice flour
1 tablespoon glutinous rice flour/ wheat starch/ tapioca flour
1 tablespoon corn flour
1/4 teaspoon salt
3 teaspoon vegetable oil

Method:
1. Sieve rice flour, glutinous rice flour, corn flour and salt into a mixing bowl.
2. Mix in water and vegetable oil and lightly beat it evenly. Ensure there's no lump in the mixtures.
3. Rest the mixtures for 1 hour.
4. Boil the water in the steamer.
5. Brush tray with oil and add a laddle of the mixtures into the tray.
6. Steam is for about 7 minutes. (I am using a corningware tray. Depending on the thickness of your tray. The time may be vary.)
7. Remove the tray from the steamer and set aside to cool.
8. Repeat step 5 - 7 with another set of tray.
9. Once the chee cheong fun is cool, use a baking spatula to roll it up.
10. To serve, unroll the chee cheong fun and cut into bite pieces. Serve it with some sweet sauce and prawn paste and garnished it with some toasted sesame and deep fried shallot.

Monday, August 22, 2011

Pineapple Tarts

My baking mood is ON. After baking pandan chiffon cake and dates & ginger stickies, my next target was pineapple tarts.

Pineapple tarts are very popular in Malaysia especially during Chinese New Year. I remembered when it's near Chinese New Year, my mum will buy a lot of pineapples to cook the pineapple jam from scratch. Cooking the pineapple jam taking a long time, especially when you have to keep stirring it, and I am sometimes the victim to help my mum stirring it under the heat.

Since this Chinese New Year I didn't get to eat the yummy pineapple tarts made by my mum. I took the opportunity to bake it on one of the Sunday. At first, I only have the intention to cook the pineapple jam from scratch on Sunday. But since after done with the pineapple jam, I decided to continue baking the pineapple tarts on that day itself.

My partner helped me with the baking. It took us about an hour to get everything done. By the time it is done, it's already about 8pm. Everything turns out to be great. Before that, my partner keep teasing me to just buy the shortcrust pastry and pineapple jam since it is widely available here. But I kept insisting to make everything by myself as I believe it will taste better and also I can make it to my liking.

When my partner tasted the pineapple tarts that we had made, and he finally agrees that making it ourselves turns out to be good. And making shortcrust pastry is so easy and it taste so much better as compared to the ready made ones. This is because the ready-made shortcrust pastry is made of margarine instead of butter. That is the biggest difference.


Below are the pineapple recipe that I had made earlier just in case you need it.

Pineapple Tarts Recipe
Make: +- 30pcs

Jam Ingredients
+-1.2 kilograms whole pineapples  (without skin on)
+-150 grams rock sugars
3 cloves
1/2 lemon juice

Methods:

1. Remove the core of the pineapple and grate coarsely.
2. Cook the grated pineapple with the pineapple juice in a pan.
3. Add in the cloves and rock sugar into the pan. You can adjust the amount of sugar as according to your sweetness liking.
4. Cook the grated pineapple until it is almost dry. Constantly stirring until the mixture is dry over low heat.
5. Add in the lemon juice and continuing stirring the mixtures until it is dry. Then remove from heat and set aside to cool.

Pastry Ingredients
150 grams plain flour
1/4 teaspoon salt
2 tablespoon corn flour
100 grams butter
1 1/2 icing sugar
1 egg yolk

Methods
1. Preheat the oven to 180 degree Celcius.
2. Sieve plain flour, corn flour, salt and icing sugar into the mixing bowl.
3. Rub in the butter into the mixture until it looks like bread crumbs.
4. Then add in the egg yolk into the mixtures to form a dough.
5. Roll pastry into about 0.7cm thickness and stamp out with a cutter. Press about 0.25 deep in the centre of the pastry. 
6. Add in about a teaspoon of pineapple jam.
7. Lastly you can decorate the tart with two strips of pastry placed to make a cross on the top.
8. Bake in a preheat oven at 180 degree Celcius for 10 to 15 minutes or until golden brown. 

Saturday, August 20, 2011

Elliot's Stable


Saturday is always the day for me to spend time with my partner. It is also usually our outing/ dating day. And also the day where the kitchen is closed.

After shopping around in the Auckland, it's time to look around for lunch. We ended up visiting the Elliot's Stable for a light lunch. Elliot's Stable is an epicurian village which was tranformed into a distinctive marketplace.  


There are a few different gourmet eateries to choose from. We chose to try Frankies Wurstbude sausage rolls with coleslaw as a side. It turns out to be yummy.


Apart from that, we also had the caramelised apple crepe from Torchon French Creperies as dessert. In my opinion, this stall is quite similar to the one that I had before in Ponsonby which I had mentioned in my previous post. Why do I say that, it's because the menu is totally the same as La Cantine du Torchon in Ponsonby.


It was a good lunch although it was a light ones.

Elliot's Stable

Friday, August 19, 2011

Wynyard Quarter

Recently Auckland has another happening place going on in the city. The Wynyard Quarter was opened on 6th August. It is only the first stage of the project and more to come. However, I didn't went there until last week.

The Wynyard Quarter had attracted a lot of attentions from the locals and tourists. There's a few things in the Wynyard Quarters that perhaps attracted a lot of people there.


Firstly is the Viaduct Events Centre which may future host many events that are happening in Auckland. The first event that will be hosted there is the New Zealand's Fashion Week that is happening on 29th August 2011, Monday, until 3rd September 2011, Saturday.


Besides, there's also heritage cargo shed and fishing boats tied up beside the Viaducts Event Centre. The information booth is also being made from an empty container. Even the public washrooms are also being made from  a container.

Along the Wynyard Quarter, there's also ten new restaurants and bars available there. Some of it are yet to open. The restaurants and cafes include Marvel Grill, Gelatiamo, Rushworth, The Conservatory, Jack Tar, Urban Turban, I Sushi & Yakitori, Live Seafood Restaurant & Bar, and Pescado. Of those that had opened, there was a long queue at the Gelatiamo where everyone wanted to grab a gelato during the sunny day.


Trams also return to the city after 50 years. There are two 1920s heritage trams on the 1.5km circuit around Wynyard Quarter. The trams are running in a 15-minute clockwise circuit along Jellicoe, Halsey, Gaunt and Daldy Streets.


Those are the few things that attracted a lot of people to the Wynyard Quarter. You can visit too if you happen to be down at the city of Auckland.

Tuesday, August 16, 2011

Risotto & Dessert

It time for a break from Chinese food for dinner. Hence on Friday night, I decided to cook mushroom and pancetta risotto for dinner served with the baby carrot that I had bought earlier from the farmer's market.


Since risotto is something that does not need much preparations, I decided to make dessert to go with the dinner. My partner suggested to make some steam puddings. Therefore, it's my responsibility to find a recipe of steam puddings. I was searching high and low for the steam puddings recipe through the Cuisine Magazine that my partner had collected since May 2006. After spending an hour looking through all the magazine, I managed to find 2 puddings recipes which were coconut bread pudding with fresh pineapple & mango puree, and date & ginger stickies.

Between the two recipes, the bread pudding is a steam pudding and meanwhile the date & ginger pudding needs to be baked. My partner preferred to have date & ginger stickies this time. Hence I am off to the nearby supermarket to buy the ingredients needed.

Preparation of the pudding was very easy and takes about 20 - 30 minutes only. Then you just bake it in the preheated oven for another 15 - 25 minutes. And it's ready to be served. I served the pudding with some berries coulis which provides some sourness taste to compliment the sweet pudding. The pudding turns out to be a very delicious and not very sweet to my liking.


Date & Ginger Stickies (Recipe from Cuisine Magazine)
Serves: 12

Ingredients:
60g butter, plus extra for the tin
200g dates, chopped into small pieces
3/2 teaspoon baking soda
1 1/4 cups boiling water
3/4 cup brown sugar
1/4 cup golden syrup
2 eggs
1 teaspoon banilla essence
1 1/3 cups plain flour
1 teaspoon baking powder
50g crystallised ginger, finely chopped

Methods:
1. Preheat the oven to 175 degree Celcius fanbake.
2. Butter 12 small muffin tins with a little extra butter.
3. Put the butter, dates, baking soda and water in a large bowl.
4. Soak this mixture for a couple of minutes. The mix in the sugar and golden syrup.
5. Whisk in the eggs and vanilla then fold in the sifted flour and baking powder.
6. Mix in the ginger.
7. Pour the mixtures into the muffin tins to about 2/3 full.
8. Bake for about 15 - 25 minutes or until the cakes feel firm in the center.
9. To check whether the cakes is fully cooked or not, insert in a skewer in the center and if it comes out clean, it means it's fully cooked.
10. To serve warm, heat up the puddings in the microwave for 20 seconds.

Monday, August 15, 2011

Polar Blast hits New Zealand

It's already the mid month of August, which means the winter season is almost to an end. However, this week there's another polar blast that hits New Zealand causing heavy snow falls across the country.

According to the local newspaper article,New Zealand Herald, it is one in 50 year event and warned that it could last for a several more days. Even some parts of Auckland may have snow falls.

So far, I have not seen any snow in Auckland, but this morning there's hail around the area where I lived. Hail don't happens often. It come and go very fast, maybe in just 1 - 2 minutes. Previously hail does happen in sometime last month, but I missed the chance to take a photo of it. Hence this morning, I quickly grab the camera and opened the room's window took some photos of the hail that happened outside our house through the cold blast.

Once I opened the window, I managed to see a group of hail on top of the roof just outside my room. Quickly I snapped a photo of it.


Then looking down, I saw my car also being scattered with hail on it, and quite a few sits on top of the screen viper.


The hail stones don't last for long as the rain and sun actually melted it away very quickly.

Today is definately a cold day. While I am typing this blog, I can feel that all my fingers are freezing and I definately in need of a glove for now.

Friday, August 12, 2011

Pandan Chiffon Cake

In a day where I don't have to cook for dinner as my partner and I will be having the leftover food from the accumulation of 2 days dinner, I took the opportunity to bake a pandan chiffon cake.

It is my first time baking it. While I was at home, my mum used to bake orange chiffon cake quite often. Meanwhile I am the usual one who was helping to extract the orange juice for my mum baking.

I personally enjoyed eating chiffon cake and I can have 2 -3 pieces each time. Also in my opinion, it's the easiest cake to bake after all. Besides, my partner had always been waiting for me to bake it since the first time I mentioned it.

Therefore, on Wednesday, I decided it's time for me to bake pandan chiffon cake.

It took me some time to extract the pandan juice from the frozen pandan leaves. (Only frozen pandan leaves are available in New Zealand) After an hour plus of the preparations, it is time to set the pandan chiffon cake into the oven.

Once it was set into the oven, I kept peeping it with my finger crossed hoping that it will be successful. And after about 40 minutes, it is proven that I had successfully baked a pandan chiffon cake. It looks and taste nice though minus the pandan flavours. Perhaps the pandan juice were too diluted or I may need pandan essence to further enhance the flavour. However, I am very satisfied with the results that I had.


Pandan Chiffon Cake Recipe

Makes: 2 x 18" cake tin

Ingredients A
8 egg yolks
60 grams castor sugar
140 grams self raising flour
4 tablespoons pandan juice
6 tablespoons olive oil
1/2 teaspoon vanilla essence

Ingredients B
8 egg whites
140 grams castor sugar
1/2 teaspoon cream of tartar


Methods:
1. Separate the egg yolks and egg whites into two different mixing bowls.
2. Add in the sugar (from ingredients A) into the egg yolk and whisk with hand.
3. Then add in the pandan juice, olive oil and vanilla essence (ingredients A) into the mixtures and mix it well.
4. Lastly add in the self raising flour into the mixtures and mixed it to become a smooth batter and leave it aside.
5. Beat the egg whites using a mixer until it is foamy.
6. Add in cream of tartar and mix well.
7. Gradually, add in the sugar and mix well.
8. Beat the egg white mixtures until it is white, stiff and shining.
9. Preheat oven at 175 degree Celsius.
10. Slowly add in the egg whites mixtures into the egg yolks mixtures. Gently fold it in using a spatula. Mix it well.
11. Pour the mixtures into the cake tin and bake it for about 40 minutes or until it is brown.
12. Once the cake is done, topple the cake upside down to cool.

Thursday, August 11, 2011

3-Cups Chicken & Stir Fried Brocollini for Dinner

Tuesday was another night where I have to prepare the dinner again. Looking through the recipe book and websites, I had come to a decision to cook 3-cups chicken with the 2 boneless thighs that I had bought earlier.

This dish suppose to be cooked using a claypot, but I used only an ordinary cooking pot to cook it. This dish turns out to taste a little like a hokkien dish called "muar eu kay" which literrally means sesame oil chicken. Before cooking the chicken, I marinated the chicken with some baking soda powder for 10 minutes before cooking to keep the chicken meat soft, tender and smooth.


Meanwhile, the vegetables for the dinner was brocollini. Instead of just steaming it, I stir fried it with some dry scallops.


And at the same time, I also prepared "tong sui" (sweet chinese dessert) for after dinner. I prepared a "lor han quo 罗汉果" (also known as Buddha's fruit/ monk fruit) with dried longan and snow fungus.


Deep fried red kumara was a thing that my partner had prepared to go with the dessert.


It turns out to be a very full and satisfying dinner to myself and my partner.

Lor Han Quo, Dried Longan and Snow Fungus Sweet Dessert Recipe
Serves: 4

Ingredients:
1 pcs of lor han quo 罗汉果
1 pcs of dried snow fungus
2 handful of dried longan
4 pcs of dried honey dates
About 1 litres of water
6 teaspoons of dark molasses sugar

Method:
1. Boil the water.
2. Wash the lor han quo and crush it. Then put the whole fruit (with the skin on) into the boiling water.
3. Also add in the dried longan and boil for about 30 minutes.
4. Then add in the dark molasses sugar and boil for about 10 minutes.
5. Rinse through the snow fungus and remove the core of the fungus. Cut it into bite pieces.
6. Lastly add in the snow fungus and boil for another 10 minutes and it is ready to be served.

Monday, August 8, 2011

Dry Bak Kut Teh

It's my turn to do the cooking for this coming 2 months as my partner's mum is back to her hometown. Before that, I had been wondering what should I be cooking for dinner. Till yesterday, I decided to cook a Klang version of dry bak kut teh.

In Malaysia, especially my hometown in Klang, bak kut teh is almost available at every corner and every hour (from morning till evening). Malaysians have the choice of having bak kut teh for breakfast, lunch, dinner or even supper. One of my ex-Executive Director always having bak kut teh for breakfast as it is one of his favourite. I remembered I did join him a few times for breakfast. 

Bak Kut Teh (肉骨茶), is literally translated as "Pork Bone Tea" in hokkien dialect. According to Wikipedia, Bak kut teh was introduced to Malaya in the 19th century by Chinese coolies and workers of Hokkien origin. The dish is reported to supplement the meagre diet of port coolies and as a tonic to boost their health.

There are a few different version of bak kut teh. The Hokkiens' version uses dark soy sauce which is why the soup base is darker in colour as compared to the Teochews version. which is lighter in colour with more peppery taste. Apart from that, in around 1996, another Hokkien's version of bak kut teh was being introduced, which are famously known as the dry version of bak kut teh.

The dry version of bak kut teh flavour is totally different as compared to the soup version. The dry version of bak kut teh is being cooked with additional ingredients such as okra/ lady fingers, dried chilies and dry squids, which resulted to a more tangier and sharper taste.

In Klang, there are lots of famous bak kut teh places that you can visit in Klang. And I would recommend you to a few places below which I personally find it very tasty as compared to the rest.
After doing some surfing, there's a few reviews on the restaurant mentioned above that you can also read through by clicking on the link above.

For my dry version of bak kut teh, I served it with some Chinese cruller (油条) and stir fried cos lettuce with fermented bean curd (豆腐乳) as the side. Meanwhile for my rice, I garnished it with some deep fried shallot and some cut spring onion/ corriander garnish for the soup broth.

Below are my "Dry Bak Kut Teh" Recipe for your reference. Hope you will enjoy eating it.

Serves: 4

Soup Broth Ingredients:
2 pack of prepacked bak kut teh spices (recommending Tean's Gourmet brand)
500g pork belly
300g pork ribs
400g canned mushrooms (whole)
12 pcs deep fried beancurd (also known as tau fu pok ,豆腐卜/ 豆腐泡, in hokkien dialect)
2 pcs whole garlics
2 tablespoons dark soy sauce
1 1/2 teaspoons salt
2 teaspoons wolfberries

Preparations:
1. Boiled a pot of about 1.5 litre water.
2. Add in the 2 prepacked bak kut teh spices into the boiled water and simmer for 30 minutes.
3. Using another new pot, boiled another half pot of water. Then use the boiled water to boiled all the pork belly and pork ribs for about 5 minutes. (This method is to remove all the unwanted smell from the pork and also the bubbles that it will create.)
4. Then, add in all the pork belly, pork ribs, wolfberries, salt and dark soy sauce and simmer for about 40 minutes.
5. Add in deep fried beancurd and canned mushrooms into the soup. Simmer for another 15-20 minutes.

Dry Version Ingredient:
10 pcs dried chilies
2 pcs birds eye chilies
8 pcs okra/ lady fingers (depending on the size and your preference)
Handful of dried squid (also known as jiu hu in hokkien dialect)
3 tablespoons dark soy sauce
1/2 teaspoon of salt
500ml of bak kut teh soup broth

Preparations:
1. Remove all the pork belly and pork ribs from the soup broth.
2. Rinse the dry squid with water.
3. Heat the claypot with some oil.
4. Fry the dry squid until it is fragrant.
5. Then add in the dry chilies and bird eye chilies. Fry until it is fragrant.
6. Add in all the porks into the claypot.
7. Then add in dark soy sauce, salt and about 500ml of the soup broth into the claypot.
8. Simmered it until it is almost dry, then add in okra and stir fry till it's cooked.
9. Serve with rice and the soup broth together.

Tuesday, July 19, 2011

Sansui Japanese Cuisine & Bar

I am back again to Sansui Japanese Cuisine & Bar after our first memorable experience there. You can read my first experience that I had blogged earlier here.

This time we were back again on our second visit. This time instead of ordering the dinner set, we ordered from the ala-carte menu. By this way, we were able to try out the different things that are available from the menu.

We ordered an appetizer which was the deep fried fish bone. So far, this is the only Japanese restaurant which serves this type of appetizer. As according to my partner, this brings him back the memory of his time when he travelled to Japan. Because this was one of the appetizer that he enjoyed back then in Japan. By just looking at the photo below, you can imagine how crunchy it is. Every bite of the fish bone will produce the crunchy sound (krop-krop-krop).


Then we ordered a healthy seaweed salad. In the seaweed salad, there's a few variety of different seaweed were being added in. Some were red in color, some were dark green and some were light green.


Next to come was the homemade pot stickers dumpling which is also known as the gyoza.


We tried another type of sushi this time, which was the California roll. It was being served in a platter plate that provides 9 little squares. There were 8 pieces of sushi, and the balance of 1 little square is being used to accommodate the pickled gingers and wasabi. This presentation is indeed very creative!


Then it comes the sukiyaki hot pot. This sukiyaki hot pot contains some beef, vermicelli, tofu and garnished with some spring onion and carrot.


And last dish to arrive was the lightly manuka chip smoked Aoraki salmon. This dish arrived with a little bowl cover. Inside the bowl were full of the manuka chip smoked whereby the salmon fish being infused with. Once you remove the bowl cover, the smoke were being released. However, once you put the salmon into your mouth, you will be able to taste the manuka chip smoke.

We had both the sukiyaki and lightly manuka chip smoked Aoraki salmon with rice as our mains.

By the time we had finished all our food, our tummies were fully filled as well. Therefore, we give the dessert a miss this time. Besides, we had tried most of their dessert during our first visit.

Sansui Japanese Cuisine & Bar
Swanson Street
Auckland

Phone: 09 377 1347

Monday, June 27, 2011

Mentatz

Walking around the city wondering what will be our lunch for that day as we had already decided to have Japanese for dinner later. My partner suggested us to walk around Lorne Street to see if there's anything interesting as there's a few little restaurants/ cafe around.

As we walked past, we thought we shall try out korean at one of the restaurant. But we were quite hesistated to go in as there isn't any crowd around, as we thought it may not be as nice. Hence we further our walk down and ended up having Japanese again for lunch at Mentatz. However, it will be quite different with the dinner that we wanted to have as Mentatz specializes in tonkatsu ramen.


Since Mentatz specializes in tonkatsu ramen, we both ordered ourselves a bowl of ramen to try it out. I had ordered myself a spicy miso based broth ramen with pork cutlets. I can't recall what is the name of the dish already. Meanwhile for my partner, he ordered a tonkatsu ramen.

We were both impressed by the freshness of the ramen and the broth. It is definately a good lunch during the winter.

As according to the Japanese Restaurant booklet that I had gotten earlier, it mentioned that you can get your noodles done to your own liking: medium, well-cooked, etc. Besides, Mentatz provides patrons with the very Japanese custom of kaedama: if you've brought appretite to spare with you, finish your first lot of noodles and - leaving the broth still in your bowl - utter the magic words, "Kaedama kudasai", and you will be provided with another serving of noodles for the reasonable price of $1.50.

Mentatz Japanese Restaurant
28 Lorne Street,
Auckland

Tel: 09 357 0960